
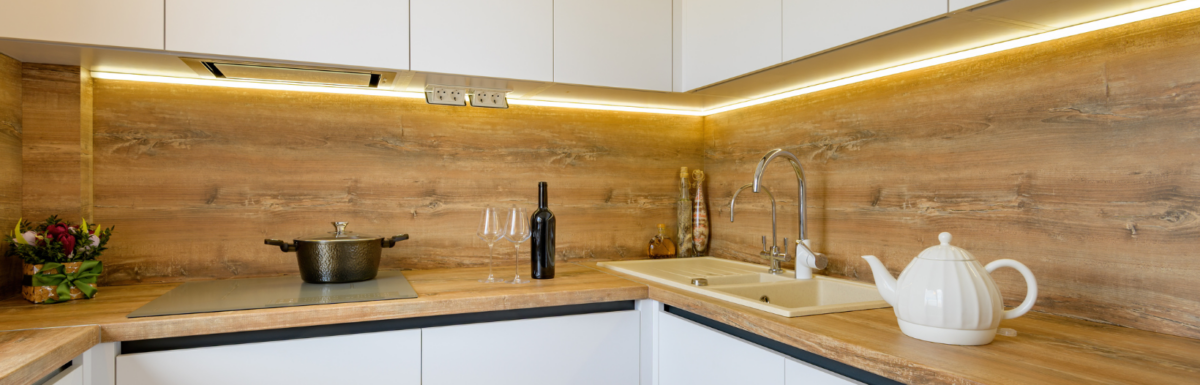
Updating the look of your kitchen doesn’t have to be expensive or time-consuming.
You can give your cabinets a fresh new look with a simple restaining job and some easily accessible materials.
This guide will show you how to do it step-by-step, so you can get the perfect kitchen makeover without breaking the bank.
Restaining Kitchen Cabinets Cost
The cost of restaining kitchen cabinets can vary depending on a few factors, such as the size of your kitchen, the condition of the cabinets, the type of stain used, and whether you hire a professional or do the work yourself. Here are some estimated costs to give you an idea:
- DIY: If you do the work yourself, the cost will be significantly lower. The cost of sandpaper, stain, and brushes can be as low as $50-$100. However, remember that doing the work yourself can be time-consuming and requires some experience.
- Professional: If you hire a professional, the cost can range from $1,500 to $5,000 or more. This cost includes the cost of labor, materials, and the expertise of the professional. The price can vary depending on the size of your kitchen, the condition of the cabinets, and the type of stain used.
- Refinishing: Refinishing is more expensive than restaining but provides a new look to your cabinets. The cost can range from $2,500 to $8,000 or more. Refinishing includes the cost of removing the old finish, sanding, staining, and applying a new finish.
Remember to get multiple quotes from professionals before choosing one to ensure you get the best price for your project.
How to Restain Kitchen Cabinets Without Stripping
Restaining kitchen cabinets without stripping is a time-saving and cost-effective option, but it requires some preparation and careful execution. Here are the steps to follow:
- Clean the cabinets: Use warm water and dish soap to clean the cabinets thoroughly. This will remove any dirt, grease, and grime from the surface of the cabinets.
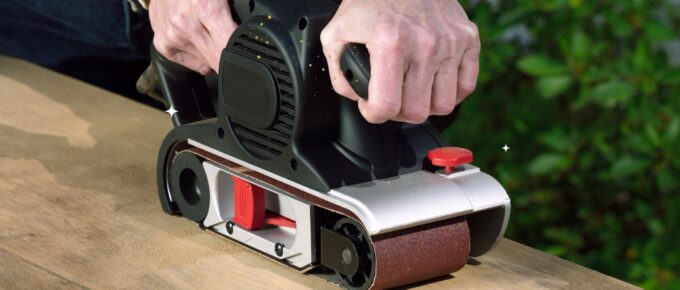
- Sand the cabinets: Use fine-grit sandpaper to lightly sand the surface of the cabinets. This will create a rough surface that the new stain can adhere to.
- Apply the new stain: Use a brush or a rag to apply the new stain to the cabinets. Work in small sections, applying the stain evenly and wiping off any excess. Let the paint dry completely before applying a second coat.
- Apply a topcoat: Once the stain has dried, apply a clear coat to protect the cabinets. Depending on your preference, you can use a polyurethane, lacquer, or wax topcoat.
- Reattach the hardware: Once the topcoat has dried, reattach the cabinet hardware.
Remember to work in a well-ventilated area and wear protective gear such as gloves and a mask to avoid inhaling fumes or getting stains on your skin.
Also, test the new stain on a small, inconspicuous area of the cabinet to ensure that you like the color before applying it to the entire surface.
How to Restain Cabinets in a Different Color
Restaining cabinets in a different color can be a great way to update the look of your kitchen or bathroom. Here are the steps to follow:
- Remove the cabinet doors and hardware: Remove the cabinet doors, drawer fronts, and hardware. Label the doors and drawers, so you know where they belong.
- Clean the cabinets: Clean the cabinets with warm water and dish soap. This will remove any dirt, grease, and grime from the surface of the cabinets.
- Sand the cabinets: Use fine-grit sandpaper to lightly sand the surface of the cabinets. This will create a rough surface that the new stain can adhere to.
- Apply the new stain: Apply the fresh stain with a brush or a rag, working in small sections. Make sure to apply the stain evenly and wipe off any excess. Allow the stain to dry completely before applying a second coat.
- Apply a topcoat: Once the stain has dried, apply a clear coat to protect the cabinets. Depending on your preference, you can use a polyurethane, lacquer, or wax topcoat.
- Reattach the hardware: Once the topcoat has dried, reattach the cabinet hardware.
Note that restaining cabinets in a different color can be a time-consuming process and requires some experience. It’s essential to choose the right type of stain for your cabinets and to test the new color on a small, inconspicuous area of the cabinet before applying it to the entire surface. If you’re not comfortable doing the work yourself, consider hiring a professional to do it for you.
Restaining Kitchen Cabinets Darker
Restaining kitchen cabinets to a darker color can be a great way to update the look of your kitchen. Here are the steps to follow:
- Remove the cabinet doors and hardware: Remove the cabinet doors, drawer fronts, and hardware. Label the doors and drawers, so you know where they belong.
- Clean the cabinets: Clean the cabinets with warm water and dish soap. This will remove any dirt, grease, and grime from the surface of the cabinets.
- Sand the cabinets: Use fine-grit sandpaper to lightly sand the surface of the cabinets. This will create a rough surface that the new stain can adhere to.
- Apply the new stain: Apply the fresh stain with a brush or a rag, working in small sections. Make sure to apply the stain evenly and wipe off any excess. Allow the stain to dry completely before applying a second coat.
- Apply a second coat: Once the first coat has dried, apply a second coat of stain. This will deepen the color and give the cabinets a richer look.
- Apply a topcoat: Once the stain has dried, apply a clear coat to protect the cabinets. Depending on your preference, you can use a polyurethane, lacquer, or wax topcoat.
- Reattach the hardware: Once the topcoat has dried, reattach the cabinet hardware.
It’s essential to choose the right type of stain for your cabinets and to test the new color on a small, inconspicuous area of the cabinet before applying it to the entire surface. If you’re not comfortable doing the work yourself, consider hiring a professional to do it for you.
Restaining Kitchen Cabinets Lighter
Restaining kitchen cabinets to a lighter color can be a great way to update the look of your kitchen. Here are the steps to follow:
- Remove the cabinet doors and hardware: Remove the cabinet doors, drawer fronts, and hardware. Label the doors and drawers, so you know where they belong.
- Clean the cabinets: Clean the cabinets with warm water and dish soap. This will remove any dirt, grease, and grime from the surface of the cabinets.
- Sand the cabinets: Use fine-grit sandpaper to lightly sand the surface of the cabinets. This will create a rough surface that the new stain can adhere to.
- Apply a wood conditioner: Apply a wood conditioner to the cabinets to help the new stain go on evenly. Follow the instructions on the container for application and drying times.
- Apply the new stain: Apply the new, lighter stain with a brush or a rag, working in small sections. Make sure to apply the stain evenly and wipe off any excess. Allow the stain to dry completely before applying a second coat.
- Apply a second coat: Once the first coat has dried, apply a second coat of stain. This will deepen the color and give the cabinets a richer look.
- Apply a topcoat: Once the stain has dried, apply a clear coat to protect the cabinets. Depending on your preference, you can use a polyurethane, lacquer, or wax topcoat.
- Reattach the hardware: Once the topcoat has dried, reattach the cabinet hardware.
It’s essential to choose the right type of stain for your cabinets and to test the new color on a small, inconspicuous area of the cabinet before applying it to the entire surface. If you’re not comfortable doing the work yourself, consider hiring a professional to do it for you.
Prep Work: Clean, Sand & Remove Hardware
Before you jump into the staining process, there are a few essential steps.
Start by cleaning all the surfaces of your cabinets with a degreaser. Once they’ve dried, use sandpaper of varying grades (coarse, medium, and fine) for sanding away any scratches or imperfections.
Finally, remove all the cabinet handles and other hardware that could get in the way of painting. With this prep work complete, you will be ready to start staining!
Applying the Stain & Polyurethane
Now it’s time to grab the stain. Use a cloth, not a brush, to better control how much is applied.
Start by lightly wiping it on and then use circular strokes outward to spread it evenly. Increase pressure if needed to get an even more consistent finish.
When you’re finished applying the stain, let it dry for at least 6 hours, then apply two coats of polyurethane on top with a new paintbrush. Allow each coat to dry thoroughly before applying the next one.
Add Finishing Touches
Once you’ve finished staining your cabinets, it’s time to give them a final touch.
To do this, grab a piece of steel wool and gently rub it over the surface to reduce any residue.
Finally, re-install your hardware and admire the results—your kitchen cabinets should look brand new!
Damage Control – Removing Stains and Scratches
Damaged kitchen cabinets can be a concern when restaining, so you must remove any scratches or discoloration on the surface before beginning.
Start by cleaning the surface with a soft cloth to erase stubborn dirt and marks.
Try using a mild abrasive cleaner like baking soda and water for more resistant stains. If your cabinets have deep scratches, fill them with wood putty, then sand them down until smooth.
Once dry and dust-free, your cabinet is ready for staining!
Reattach Cabinet Hardware for a Finished Look
Once the staining is complete, it’s time to reattach the hardware.
Start by wiping down the hinges and handles, then screw them back into place.
If replacing old hardware with new pieces, measure your holes first and mark where each should go before drilling.
Be sure to take your time when installing new pieces so everything looks uniform. When finished, sit back and admire your handiwork!